
So you have been reading about how effective and lucrative marketing campaigns are, and you are not sure where and how to set one up or where to start. Or perhaps how much this will cost you? Then this article is for you. You will learn how to build an automated email campaign for free in AWeber.

If you create an interesting and engaging campaign it is likely that your subscribers will turn into customers. Potential customers will read your content, get interested in your product or service offered, sign up to your mailing list, and this is when they start receiving your automated emails.
You can send emails with product information, educational content or sales emails.
This is a step-by-step guide to create an email campaign in AWeber.
Disclosure: This post contains affiliate links. For more information please see my disclosure here
What is AWeber?
AWeber is an autoresponder software that allows you to send automated emails to subscribed customers. Thus creating a marketing campaign that operates automatically.
This means that you will only do the work once, and the emails are sent out to each new subscriber.
What is My Campaign About?
Before you set up the campaign on the autoresponder you have to think about what you want to communicate to your audience. Is it a:
- welcome campaign
- product information
- educational, perhaps a course over a number of days
- selling a product
Once you have this sorted you have to plan a series of follow up emails which you will then insert into your autoresponder, in this case, AWeber.
A Quick Example of A Campaign
Let’s say you have a product to promote. This can be your own product or an affiliate product that you are knowledgeable about.
Prepare a series of emails that will be automatically sent to new subscribers.
To make this easy for you, think about writing one of your articles, a review or educational, and break it down into 3 or 5 emails.
First Email. Introduce Yourself or Your Company
This is your welcome email. Make it short and to the point. Introduce yourself or your company, welcome the new member and explain what the email topic is about.
This can start like this:
Welcome and thank you for subscribing. In the next few days, you will learn how to.., and continue describing the benefits of your product or service.
Follow Up Emails. Elaborate Information
The rest of the emails should include information on the benefits and uses of the product, possibly without giving away what your product is.
Give this information in your final email where you can link to the product or your affiliate link.
Create a Landing Page
Finally, create a landing page to enable potential customers to sign up for your campaign.
Landing pages can be done within AWeber itself or it can be a post or page on your blog/website.
Once all the above is planned, then you can start building the campaign on the autoresponder.
So let´s go to AWeber.
Build an Automated Email Campaign for Free?
Create a Campaign in 7 Steps
If you do not have an account yet, first you need to sign up to AWeber. It is free to start.
Step 1: Sign up to AWeber here.
Once you sign up the first thing you need to do is go to your dashboard.
Now hit Messages, then Campaign.
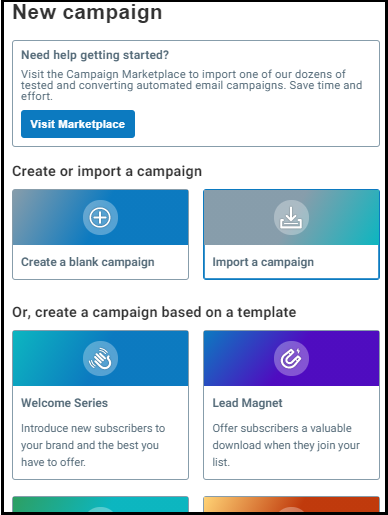
Step 2: Then Create a Campaign.
AWeber has a series of templates that you can use to help you start off.
So you can either select Create a Blank Campaign and copy and paste the emails that you have previously written, or you can use the Welcome Series or another template, and improvise and write a new campaign as guided by the information provided.
This is the page you get after clicking on Create New Campaign.
And this is the Welcome Series campaign name set up. This name is for your future reference when you set up several campaigns.
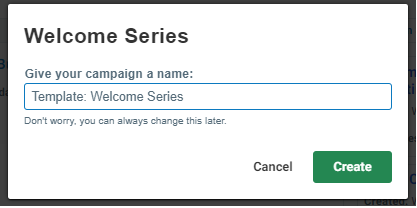
Step 3: Add a title and hit Create.
You will be directed to a series of guided emails that you can replace with your own. This is what it looks like:
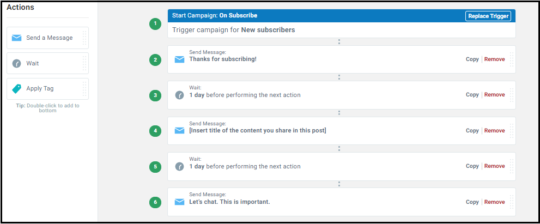
Step 4: Create or Replace the Emails Provided
Next, click on the first email message that will open in a panel on the right-hand side of your screen. Click on the same email again and it will open a new window where you can write your message, change the one provided, edit, change the background colour and make it as attractive as you want it to be.
You can include your logo or personal photo.
TIP: Carefully Select Your Email Titles To Attract Attention. Remember that many of us receive hundreds of emails daily and most of it goes unnoticed unless it has a catchy title, that makes one click and read the message.
Once you´re done and happy with your email, you can preview and test it by sending it to your own email, and then save it.
Save and exit to go back to your dashboard and continue writing the rest of the emails in your campaign.
Step 5: Add a Time When Your Emails are to be Delivered
Make sure to add the wait time between each email. This depends on how frequent you want to send the emails, one day later, two days later etc. Simply hit the Wait button on the left or within the Welcome Campaign template chosen and change the time to hours or days as required.
And that is all! You already have your campaign set. Save and Exit and return to your main dashboard where you will see your new campaign in draft mode.
Underneath you have a button that says Sharing Options. Take the link provided and insert it into your mailing list on your landing page.
Step 6: Save and Exit
And here is a quick tutorial on Building an Automated Campaign by AWeber.
Conclusion
This article is a walkthrough of how easy it is to create a new marketing campaign on the autoresponder AWeber.
AWeber is free to join and you can have up to 500 subscribers without paying anything. Isn´t that amazing!
Besides, AWeber is considered one of the best autoresponders on the market.
Prepare a series of emails related to your product or service, get a landing page from AWeber itself or write one post or page on your blog.
Next, automate the campaign on AWeber as shown in the above step by step instructions.
I hope the information is helpful and you can start creating your marketing campaign today.
This is an easy step by step method of building an automated email campaign. Aweber is sure one of the best when it comes to achieving this. So far so good i’ve been using this for months now and i have never seen the need to explore other options. Thanks for dropping such a helpful article here
Hi Danny, thank you for writing and sharing your insight about Aweber. I wish you the best of luck with your campaigns.