

Welcome to your self-publishing journey! The idea of publishing a book can feel overwhelming, but it doesn’t have to be. This guide will demystify the entire process on Amazon’s Kindle Direct Publishing (KDP) platform, breaking it down into a simple, step-by-step path. Think of this as your personal roadmap from a blank page to becoming a published author. Let’s get started to get your first book on Amazon.
1. The Foundation: Why Amazon KDP is a Game-Changer
Before we dive into the “how,” let’s explore the “what” and “why.” Understanding the KDP platform and its advantages is the first step toward building a successful publishing business.
1.1. What is KDP and How Does It Work?
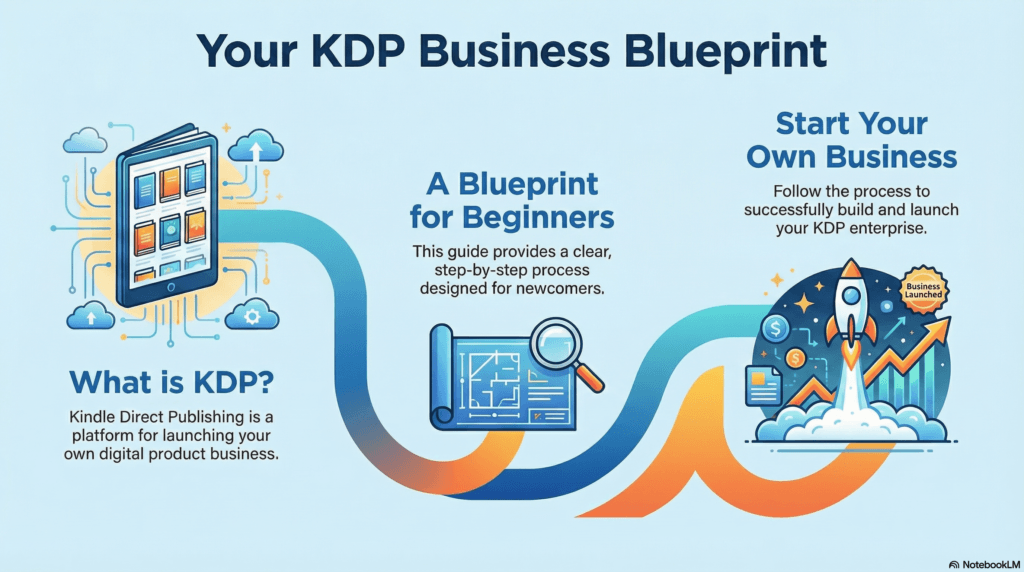
KDP, which stands for Kindle Direct Publishing, is Amazon’s free self-publishing platform that launched in 2007. It empowers authors and creators to publish eBooks, paperbacks, and hardcovers without any upfront costs or dealing with the complexities of traditional publishing.
The magic behind KDP for physical books is its print-on-demand model. This means you don’t have to buy or store thousands of books. Instead, Amazon prints a single copy of your book only after a customer places an order and ships it directly to them. The printing cost is simply deducted from your earnings.
Here’s a simple breakdown of the process:
- Upload Your Files: You upload your book’s interior manuscript and cover files to the KDP platform.
- Publish Your Book: You fill out your book’s details (like title and price) and hit “Publish.” It appears on Amazon marketplaces worldwide in less than 72 hours.
- Customer Buys Your Book: A shopper on Amazon finds your book, clicks on it and purchases it.
- Amazon Prints & Ships: Amazon’s print-on-demand technology system prints a copy of your book and ships it directly to the customer. They also handle all customer service.
- You Get Paid: Amazon pays you a royalty for every book sold, depositing the money directly into your bank account.
1.2. The 5 Key Advantages of KDP for Beginners
For a first-time author, KDP removes many of the traditional barriers to entry, making it an ideal platform to start your career.
- Huge Distribution: Your book gets instant access to Amazon’s massive global marketplace. You can tap into markets across the world without ever leaving your desk.
- Go to Market Fast: While traditional publishing can take months or even years, you can upload your book to KDP in minutes and see it live for sale in less than 72 hours.
- Solid Payment: Amazon offers a very high royalty payout. For paperbacks and hardcovers, you earn a 60% royalty on your list price, minus the printing cost.
- Never Hold Any Inventory: This is a huge advantage. The print-on-demand model means you have zero upfront investment risk. Too many people try to publish a book and have to hold on to tens of thousands of copies for decades because they are unable to sell the minimum order requirements by publishing companies. With KDP, you never have to pay for printing or worry about storing unsold copies.
- Retain the Rights to Your Work: You are the publisher, and you own the full rights to your work. This means you can distribute and sell it anywhere else you like, giving you complete creative and business control.
1.3. What Can You Publish on KDP?
KDP is not just for novelists. You can publish a wide range of books, which are often categorized by their interior content level. Understanding these types can help you decide where to start.
| Book Type | Examples | Competition Level |
| Low-Content | Journals, planners, log books, diaries | High |
| Medium-Content | Activity books, puzzle books, coloring books | Medium |
| High-Content | Fiction/non-fiction books, novels, “how-to” guides | Lowest |
Now that you understand what KDP is and why it’s such a powerful tool for new authors, let’s move on to the practical steps of creating your very first book.
2. The Blueprint: Creating Your First Book
Creating a book for KDP involves four key stages: research, content creation, cover design, and interior formatting. Don’t worry if you’re not an expert writer or a professional designer—there are straightforward paths to creating a high-quality product.
2.1. Step 1: Niche & Keyword Research
The most successful books on KDP are created with the customer in mind. The first step isn’t writing; it’s researching what people are already searching for and buying. Your goal is to find a book topic that has clear buyer demand (look for a Best Seller Rank (BSR) under 80,000) but isn’t overly saturated with competition (look for some books on the first page with low review counts). These metrics are important because a low BSR is a direct proxy for sales velocity, indicating the book is selling consistently every day. Finding competitors with low reviews signals the niche isn’t “locked down” by established bestsellers, giving you a genuine opportunity to compete.
Here are three simple research methods:
- Amazon Bestseller Categories: Go to Amazon’s “Bestsellers” page, click on “Books,” and navigate through the different categories. This shows you what topics and book types are currently selling well and can give you a ton of ideas.
- Amazon Search Bar: Start typing a broad topic (like “journal” or “coloring book”) into the Amazon search bar. Pay close attention to the auto-suggestions that appear. These are the exact phrases that real customers are actively searching for.
- Competitor Analysis: Once you have a keyword idea, search for it on Amazon. Look at the top books that appear. Click on them to check their BSR (you can find this in the product details section) and see how many reviews they have. This gives you a clear picture of demand and competition.
2.2. Step 2: Creating Your Manuscript
The “manuscript” is simply the interior content of your book. For this step, you have a core decision to make: create it yourself or hire someone to do it for you.
| Approach | Key Benefit | What It Involves |
| DIY (Do It Yourself) | Saves Money | Writing the content yourself, or using AI tools like ChatGPT to help you write faster. |
| Outsource | Saves Time | Hiring ghostwriters (for high-content) or freelance designers (for low-content) on platforms like Fiverr. |
A Note on Using AI (like ChatGPT) AI is an amazing tool that can help you write faster and significantly cut costs, but it should be used as a writing partner, not a replacement for your own effort. To create a high-quality book that readers will love, follow these three critical rules:
- Never just copy and paste. Use AI to generate a first draft or ideas, but don’t publish raw, unedited output.
- Always edit and “humanize” the content. Add your unique voice, stories, and insights. Rewrite sentences to make them flow better and ensure the text is engaging and original.
- Always fact-check the information. AI can sometimes make up facts or provide outdated information. You are responsible for the accuracy of your book’s content.
When it comes to low content, tools like Bookbolt have templates ready to go.
2.3. Step 3: Designing a Professional Cover
Your book cover is your most important sales tool. It’s the first thing a customer sees, and it heavily influences their decision to click on your book or scroll past it. This is the single most important investment you can make in your book’s success. A professional cover signals quality and is often the only thing that separates a click from a scroll.
You don’t need a huge budget. You can find talented designers on platforms like Fiverr who can create a high-quality, professional book cover, with some gigs costing as little as $35. When you order your cover for a paperback, you will need to ask the designer for a final print-ready PDF file.
2.4. Step 4: Formatting Your Interior
Formatting is the process of preparing your manuscript file so it meets Amazon’s printing specifications. A well-formatted book looks professional and is easy for the reader to enjoy. You can do this yourself using a program like Microsoft Word.
Here are the key formatting rules for a paperback book:
- Trim Size: In Word, go to Layout > Size and set the page size to match your desired book size (e.g., 6×9 inches is a common size for non-fiction books).
- Margins: Go to Layout > Margins > Custom Margins. Under the “Pages” section, select “Mirror Margins.” This ensures the inside margin is slightly wider to accommodate the book’s spine, creating a professional look.
- Text: Select your body text and set it to “Justify.” Use a clean, readable font like Garamond or Times New Roman in size 12.
- Chapters: For every chapter title, apply the “Heading 1” style. This is crucial for creating an organized structure that KDP can recognize.
- Page Breaks: At the end of each chapter, insert a page break (Insert > Page Break). This ensures each new chapter starts on a new page, rather than immediately following the previous one.
- File Type: Once your formatting is complete, save the final file as a PDF. This locks in the formatting and is the required file type for uploading a paperback manuscript.
You’ve just built a book from the ground up—the hardest part is over. Now, let’s get it published.
3. The Launch: Publishing on Amazon
This is the final step where all your hard work comes together. Uploading your book to KDP is a straightforward process that involves filling out a series of forms with the information and files you’ve already prepared.
3.1. Step 5: The KDP Upload Checklist
Follow this checklist to publish your paperback book on KDP:
- Sign Up: Go to kdp.amazon.com and create a free account. You will need to enter your personal, tax, and bank information so Amazon can pay you your royalties.
- Create New Title: From your KDP dashboard, click the “+ Create” button and select “Paperback” from the options.
- Enter Book Details: Fill in your Title, Subtitle, and Author Name. You are welcome to use a pen name instead of your real name.
- Write Your Description: Write a compelling book description that tells readers what your book is about and why they should buy it. You can use ChatGPT to generate a great first draft of your description using copywriting formulas.
- Add Keywords: Fill in the 7 keyword boxes with phrases you think customers would type into the Amazon search bar to find a book like yours. Think like a shopper!
Pro Tip: Do not use the exact same keywords that are already in your title and subtitle. Amazon already indexes your book for those terms. Use these seven keyword slots for new phrases customers might search for to maximize your book’s visibility.
- Choose Categories: Select up to three relevant categories for your book. This helps Amazon place your book on the right “digital shelves.”
- Get Your ISBN: An ISBN is a unique identifier for your book. Click the button to get a free KDP ISBN. Amazon will assign one to your book at no cost. Low content books do not require an ISBN on KDP.
- Upload Your Files: This is the big moment! Upload your formatted PDF manuscript (the interior file) and your PDF cover file.
- Preview Your Book: Use the “Launch Previewer” tool. This is a critical step. The previewer will show you exactly how your book will look when printed. Check carefully for any formatting errors, typos, or cover alignment issues. Once you’re satisfied, click “Approve.”
3.2. Step 6: Pricing, Royalties, and Getting Paid
The final step is to set your price. For paperback books, your royalty is calculated using a simple formula:
(List Price x 60%) – Printing Cost = Your Royalty
For example, if you price your book at 15.00** and the printing cost for your specific book (based on page count and size) is **6.12, your royalty would be *2.88** per sale. *(15.00 x 0.60) – $6.12 = $9.00 – $6.12 = $2.88
Amazon pays royalties monthly, but there is a 60-day delay. This means the royalties you earn in September will be paid out at the end of November.
Once you set your price and confirm the details, you can click “Publish Your Paperback Book.” Now that your book is live, the next step is to make sure it gets seen by customers.
4. The Growth: Finding Your First Readers
Your book is published—an amazing achievement! The work doesn’t stop here, though. Now the focus shifts to marketing and making sure your book finds its audience.
4.1. The First 30 Days: Getting Reviews & Sales
The first month of a book’s life is crucial. Your primary goal is to generate sales and, most importantly, reviews. Sales and reviews are signals to Amazon’s algorithm that your book is something people want. This “social proof” makes it much easier to get more sales.
A great starting goal is to get a minimum of 15 reviews. You can get these initial reviews by reaching out to your own social media audience or by using review-gathering sites like Book Reverb or Book Bounty, where authors can exchange honest reviews within a community to build initial credibility.
4.2. A Beginner’s Introduction to Amazon Ads
Amazon Ads are the most direct and effective way to get your book in front of thousands of potential buyers already shopping on Amazon. Because the typical consumer becomes ‘ad blind,’ they often don’t even realize the top search results are sponsored products. This is why ads are so powerful—they allow you to purchase prime, trusted real estate at the top of the page. The platform uses a “pay-per-click” model, which means you only pay when a shopper actually clicks on your ad.
Here is a simple, beginner-friendly ad strategy to get started:
- Start Small: Begin with a low daily budget, such as 5-10 per day. A common misconception is that you will spend this entire amount every day. In reality, your campaign will rarely spend the full daily budget, especially at first.
- Choose Your Campaign Type: For your first ad, create an “Automatic targeting” campaign. This is the simplest option, as it allows Amazon’s algorithm to automatically choose where to show your ad based on your book’s title, keywords, and categories.
- Set Your Bidding Strategy: Select “Dynamic bids – down only.” This is the safest and most conservative option for a new advertiser. It tells Amazon to lower your bid if a click is less likely to result in a sale, helping you save money while you learn.
5. Your Journey as an Author Begins
You’ve done it! You now have a complete understanding of the entire self-publishing process, from a simple idea to a live book on Amazon with a marketing plan. While it certainly takes effort, KDP has created an incredible opportunity for anyone with a story to tell or an idea to share. The path is clear, and the tools are at your fingertips. Now, it’s time to take that first step and begin your own publishing journey.