Are you new to KDP or struggling to upload your Low Content Paperback? Then this article on how to upload a book on Amazon KDP is for you.
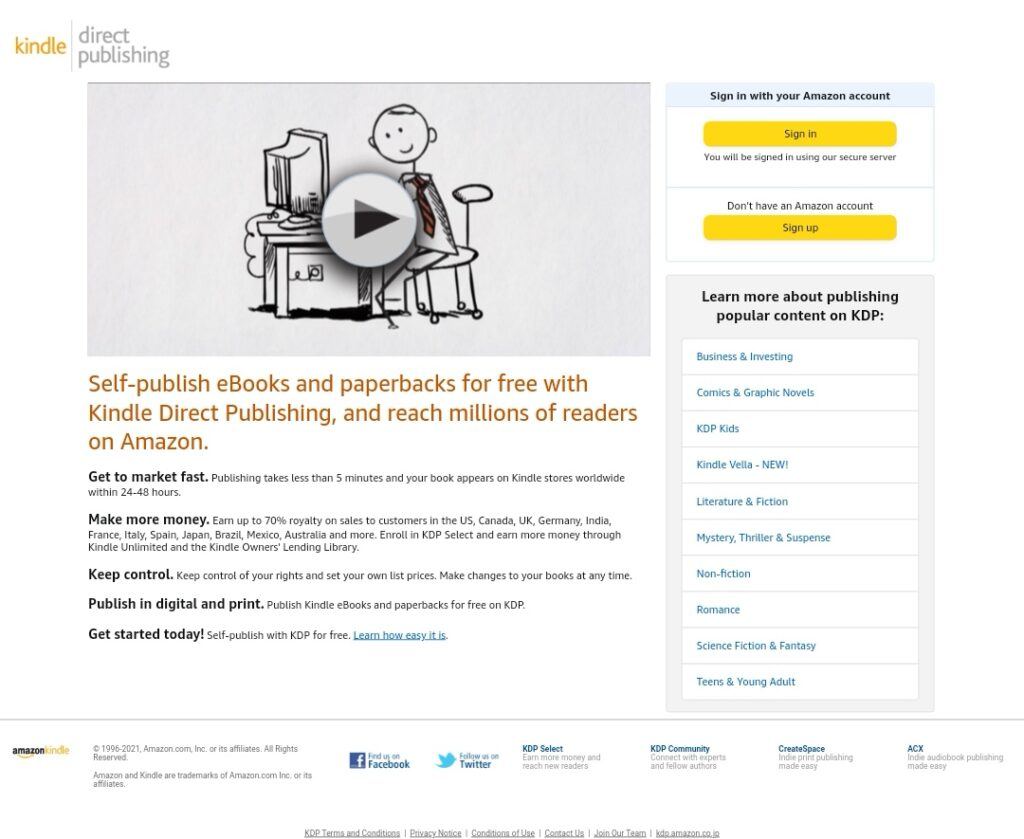
Today I´m going to walk you through the process of uploading a paperback book on Amazon KDP (Kindle Direct Publishing). The book is a no-content book, and I will create the cover using the KDP cover creator and a quote image for the cover.
What are No and Low Content Books?
No content and low content books are books like notebooks, diaries, journals, coloring books, activity books, and puzzle books. You can create these books without being a writer then self-publish and sell these books on the Amazon marketplace.
So
How Do I Upload A Book to Amazon?
Prepare the information. I´d be using the following:
Think of a title for the book: Cheers to Pour Decisions
Note: If you plan to run ads in the future, Amazon may not allow it since there are wine glasses in the illustration. I had a previous title with the word wine in it and my ads were rejected. Keep that in mind when choosing the book title.
Trademark Check. I make sure to check if the phrase is trademarked. I check USTPO for the US market. You may also want to check trademarks for other markets.
Image for the front cover: I purchased the illustration on Creative Fabrica, and I changed the colors using Canva Pro. This part is optional since you don´t need the image at all. The KDP Cover creator will create the title for you, according to the words or a phrase you enter as the title of the book.
Subtitle: Funny Gag Gift Notebook for Adults
Use AMZ Suggestion Expander (a free chrome extension) to expand the list of search results on the Amazon search bar. This is how I find my long-tail keywords for the subtitle and back-end keywords.
The Manuscript or book interior: You can download a free lined interior from Bookbolt.
Author Name: T123 Press (I came up with a random pen name). Some people try to use keywords in the author’s name to help them rank their books. I prefer not to risk since it is against KDP rules.
So now that I have everything ready, we can start uploading to KDP. Make sure you save your work during the process if you are writing everything directly on the platform. Sometimes I have to start all over as the system does not save data automatically.
Step by Step Uploading Your Paperbook to Amazon
I assume you have an account open. It is free to join.
Enter Book Details
Once logged in, choose Paperback Details and start filling out data. Always check your work and make sure there are no spelling mistakes. Title, subtitle, and author name cannot be changed once the book is published.
Note: It is possible to contact KDP Support to fix a typo for you once a book is published.
Select Paperback, Enter Book Title, and Subtitle:
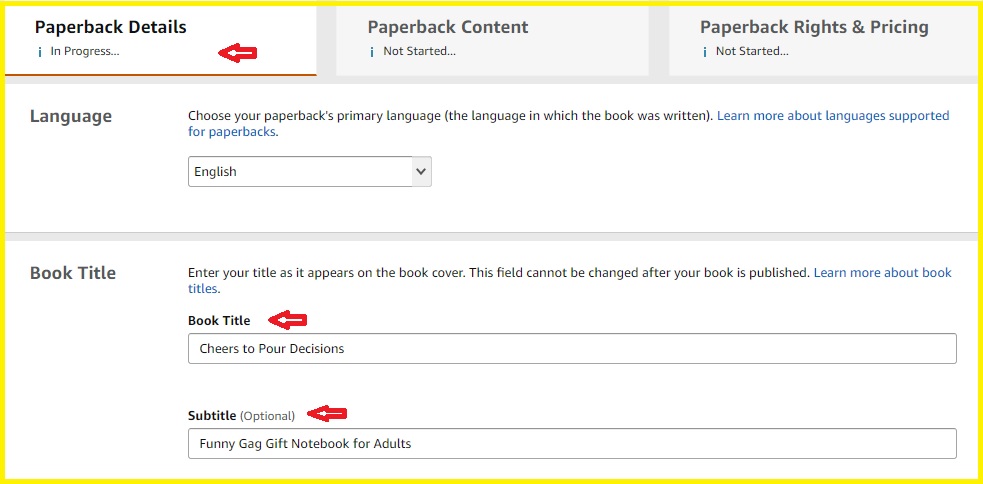
Author´s Name: Next, enter the Author‘s name.

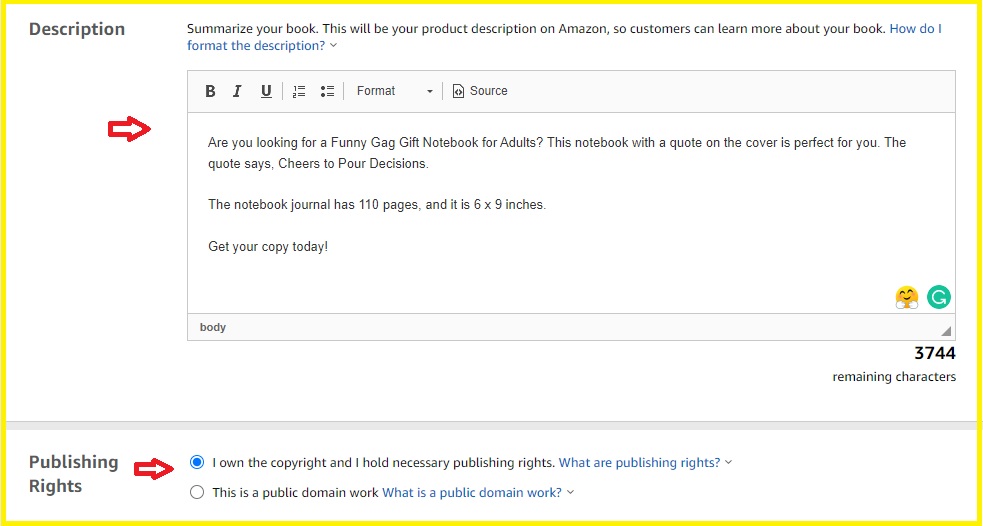
Write a Description of your book. Give as many details as you can and use keywords when possible. The description helps your ranking in Google (not Amazon).
Mark the Publishing Rights as your own. Only mark public domain box if you are using PLR (Private Label Rights) content.
Enter Keywords
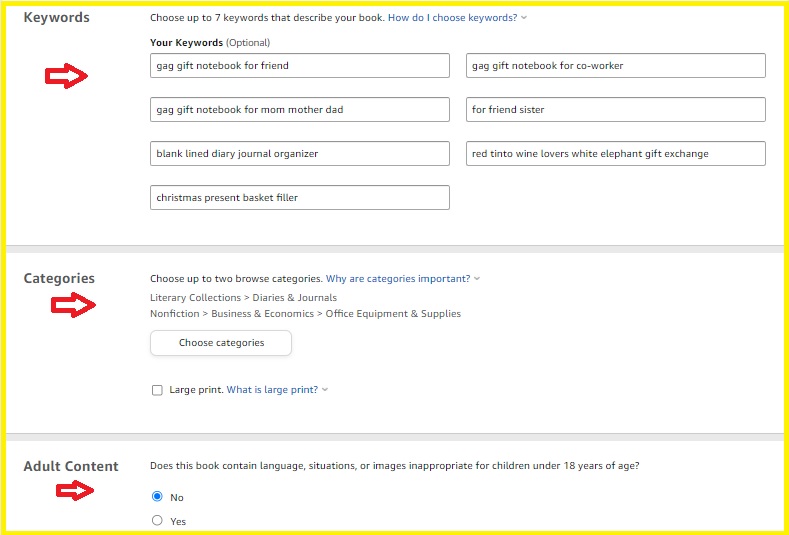
Keywords are important as they help customers find your book when doing their research on Amazon.
There is no perfect method to what keywords work best and how to fill the 7 boxes.
KDP do have some guidelines in their videos. I´ve watched a ton of video tutorials and taken a few courses. This is the method that works for me so far.
However, there are many other versions that are also correct.
I try to select 2-3 keywords I find on the Amazon search bar, I add related words to the book genre, and words related to the targeted niche or group of people.
Choose Categories
Select the proper categories for your book. This is where your book will be listed once published.
Once your book is published, you can also ask KDP to list your book under more categories (up to 8).
Save and continue to the next page.
Create a Free ISBN Number: or you may have your own.

Trim Size Selection: Select the size of your book. Bleed (when images extend to the edges of the book) or No Bleed. Matte or Glossy depends on your preference.
Upload Manuscript
Upload the interior pages you downloaded from Book Bolt in pdf format.
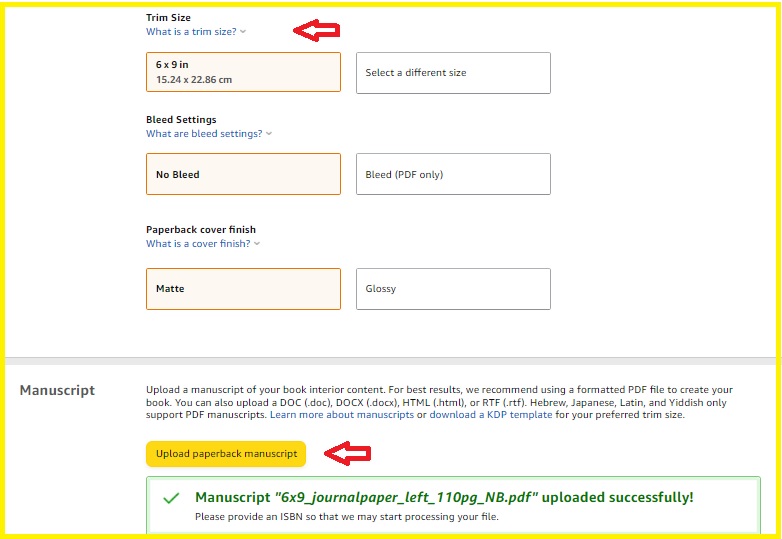
How To Create The Book Cover Using KDP Cover Creator
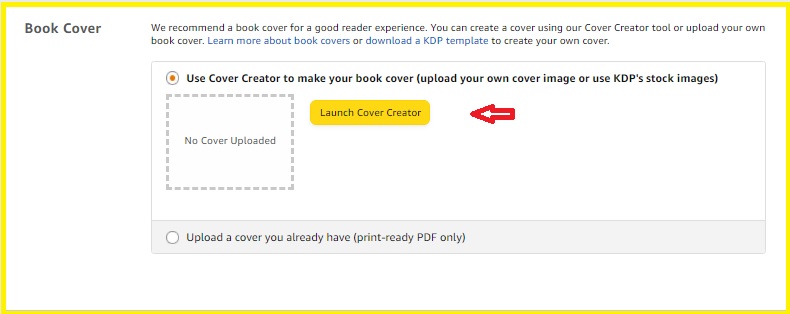
Launch KDP Cover Creator
Open the cover creator platform.
Note: If you prefer to create your own cover, read how to create a book cover on Canva.
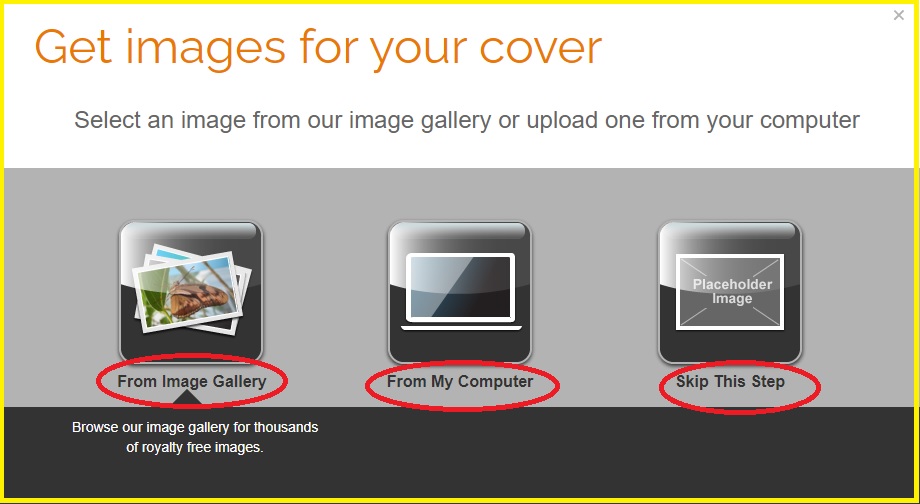
The cover creator opens up like this.
You may Skip This Step, upload an image from Your Computer or choose one from the Image Gallery.
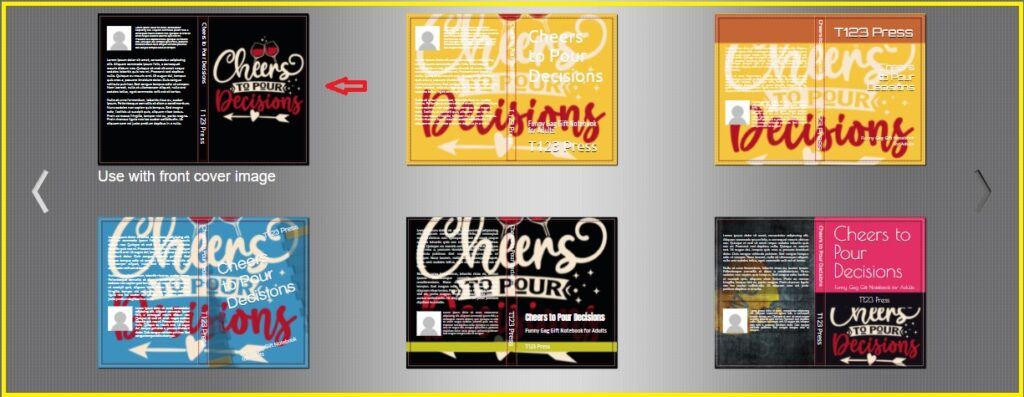
The image will display on all templates. Choose your favorite template. I selected the first one.
Edit The Cover
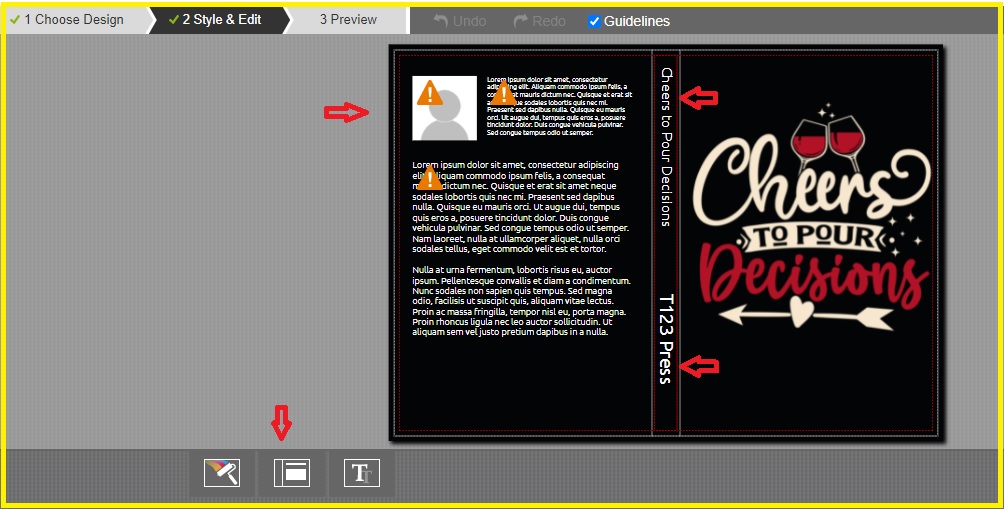
If the book title is different from what you write on the front page, the title has to be written on the book spine. Otherwise, you can remove it.
Note: You need a minimum of 120 pages to have the title on the spine.
It´s not compulsory to have the author´s name shown on the book cover. Your choice.
By default, the cover creator will show writing on the back page of your cover. You can either write a description of your book or delete all the wording by clicking on it.
You can add a logo, a photo of yourself or change the template to one that does not need a photo to be added. Use the layout button shown at the bottom.
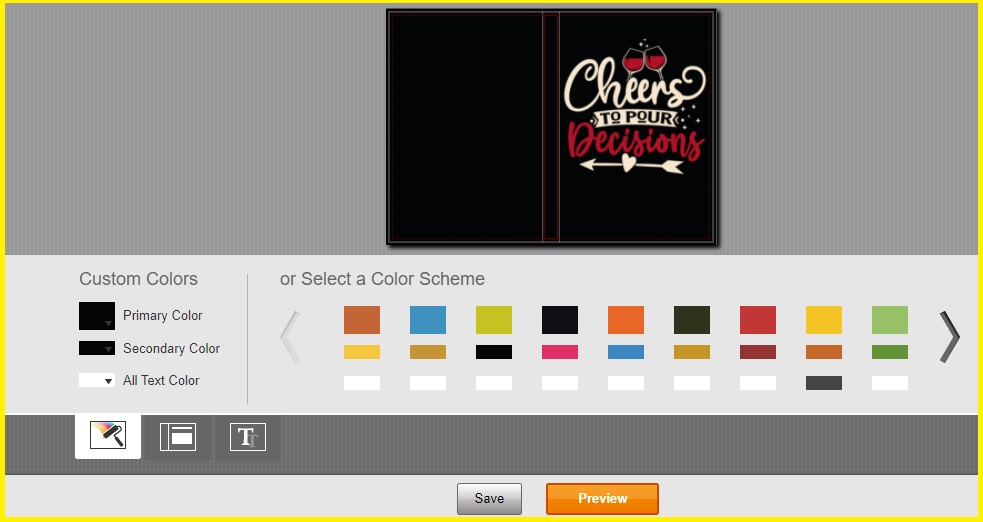
You can also change or customize the color scheme of the cover.
Preview the book, and if you are okay with what you see, save and continue.
The system will take you back to your book creation process.
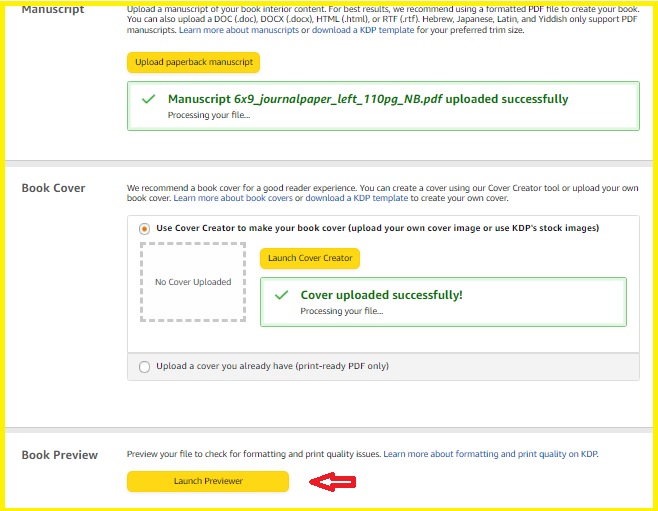
Once the yellow bars light up, select Launch Previewer. The upload may be processed quickly, or it may take a while depending on the system workload.
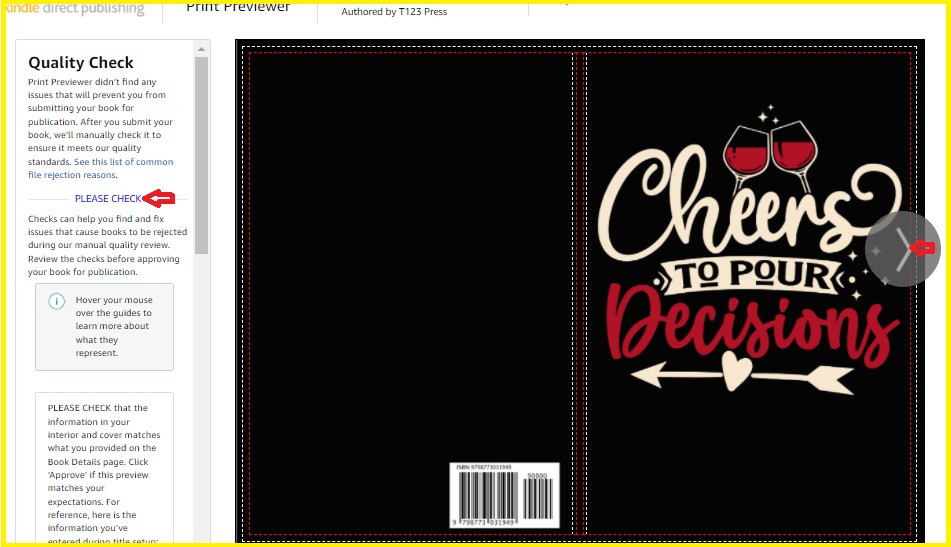
When it´s ready you´d be able to preview your book and flip through the pages by clicking on the arrow shown on the right-hand side in the screenshot below.
If there´s any error you will have the information and instructions on the left-hand column under Quality Check.
This is a preview of the interior pages.
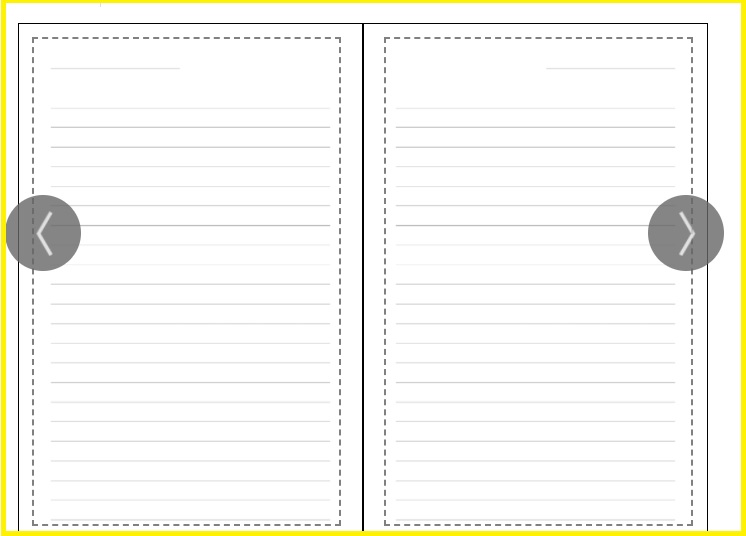
If there are no mistakes hit Approve and go to the last page.
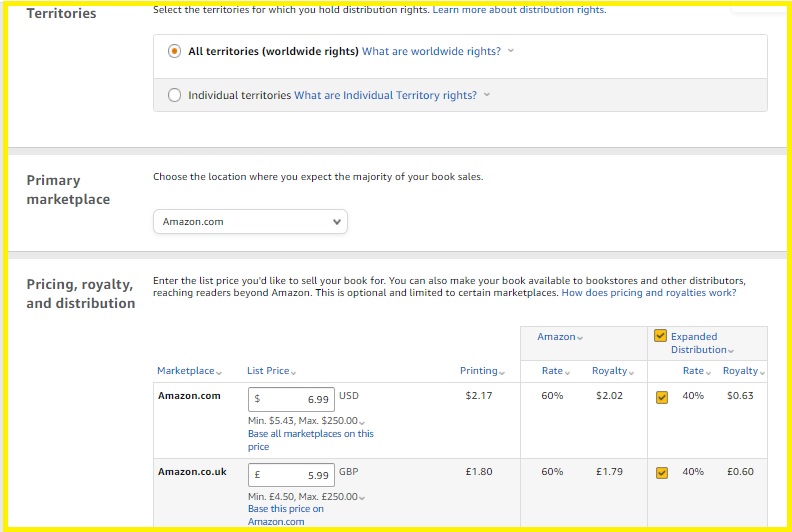
Select All Territories unless you wish to publish your book in one specific or selected countries.
Price Your Book
Finally, add the pricing. The royalty is what you will earn when your book sells. Price your book according to your competitors.
Expanded Distribution: Mark this if you want to allow other distributors to sell your book.
Publish Your Book
Now you are ready to publish your book. Hit Publish

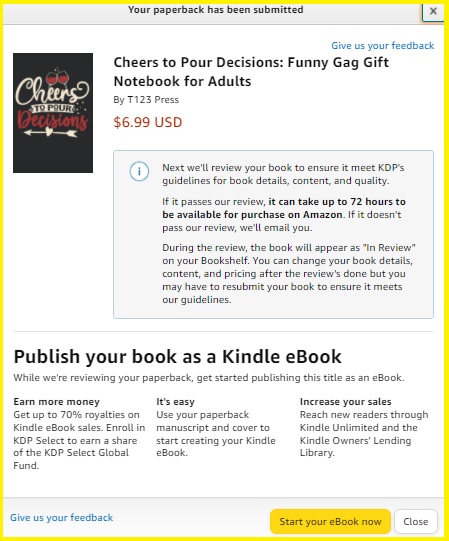
Congratulations! Your book is sent for review. Soon you will be able to sell your book on Amazon.
Conclusion
Have you ever wondered if it´s easy to publish a book on Amazon?
In this post, I show you step by step how to upload a book to KDP. The process is a bit lengthy but if you prepare the necessary information beforehand it won’t take long to complete.
Whether it´s a coloring book, a children´s book or a notebook, the manuscript to upload is always a pdf book format.
The process in short:
- Enter Title, Subtitle, and Author’s name
- Write a detailed Description
- Add Keywords
- Choose Categories
- Create ISBN
- Upload Manuscript
- Launch Cover Creator or Upload Your Own Cover
- Preview Book
- Price Your Book
- Publish
I hope you find the information helpful.
Go ahead, sign up to KDP (Kindle Direct Publishing), create, upload, and publish your first book today!
