
If you are using WordPress version 5.0 or higher, then you are using Gutenberg Editor, now called Block Editor. Today I will show you how to use Gutenberg Editor in WordPress with examples.
This includes:
- Inserting or Adding Blocks
- Configure Your Blocks
- Move Blocks Around
- Manage Block Settings
Note: When upgrading to the latest WordPress version 5.4, make sure you make a back up copy of your site first, in case something goes wrong or some coding breaks up when installing the new version, then you won´t lose any information.

So now let´s get right into Gutenberg Editor, shall we?
To set up the settings for Gutenberg Editor in your WordPress back end go to:
- Settings, writing, default editor for all users, block editor.
You have the option to choose the ´classic block´ where you will have just one block for the whole article. However, I do believe the block editor is much more fun to use and you get more benefit once you become accustomed to it.
Today I will be showing you how to do the essentials to create one complete article that includes a title, headings, paragraphs, images and adding links using the Blocks editor. By the end of this post you will know how to insert or add a block, configure each block and will also be able to move the blocks around.
First select a new post or page and start creating your content.
You can create content directly in WordPress or prepare it elsewhere and then copy and paste it in WordPress. If you copy an article that has various paragraphs Gutenberg will create as many Blocks for the number of paragraphs.
Inserting or Adding Blocks in Gutenberg
The first text that appears on your screen when you start a new blog post says Add title, so basically that is what you have to do. I assume you have already done your research to find a winning keyword and now you can write that keyword in the block space provided.
From inside the first title blog you click enter to take you to another blog.
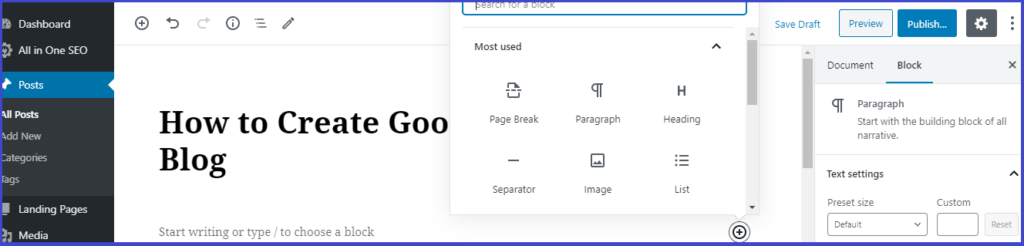
Click where you see a plus sign (+) to add a new block: a box will pop up with various options to choose from. At the top of this box you have a search bar. You can use the search tool or scroll the sliding bar on the right-hand side. See Fig. 1.
At the top left of the blog post you always have a tool bar where you can also find the (+) sign to add more blocks along with some other command icons.
Configure Your Blocks in Gutenberg
Let´s say in the first block you are writing an introduction to your article, so you choose ´paragraph´ from the selection shown in Fig.1. The pop up box will close and will take you to a new block. Start writing or copy and paste your text here.
At the top of each block you find a toolbar with icons (see Fig.2). A few commonly used symbols are the Bold and Italic and you just have to highlight the text and click on the corresponding icon. The first Paragraph icon on the left (¶) allows you to transform the paragraph block into a heading or a list, provided you change your mind and want to do display your text in another way.
Not all Blocks are interchangeable into any other block. You can change a paragraph block into a heading block but you cannot change an image block into a paragraph block. In this case you have to delete the block and create a new one.
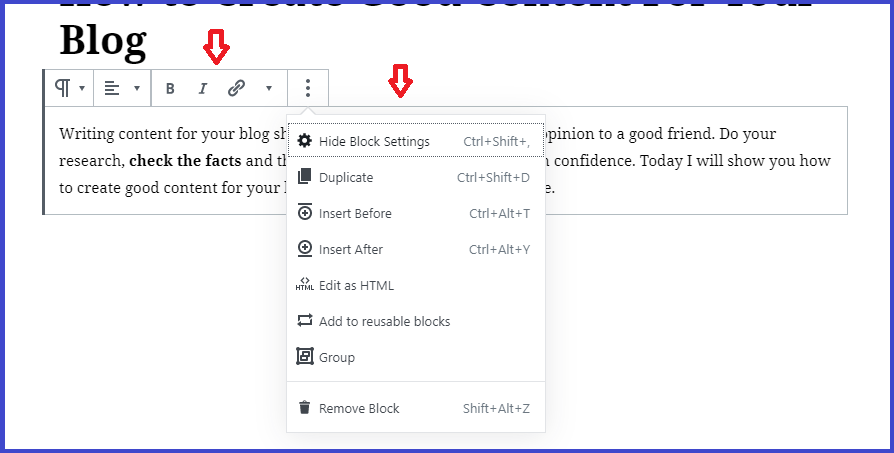
If you click on the 3 dots shown on the right hand side of the toolbar above, another window shows up with many other elements. From here you can duplicate that same block then change the written content, you can insert another block before or after, you can delete the block, or even edit as paragraph.
Let´s Add a Link
Irrespective if it’s an internal link, an external link or an affiliate link, the method to insert a link is the same.
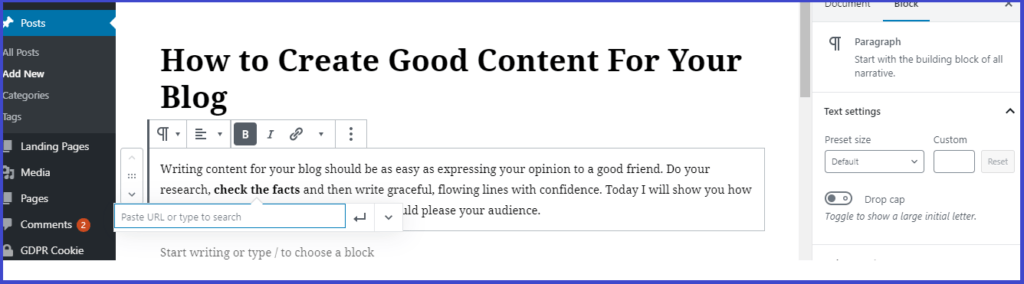
Fig.3 above shows how to add links to your content. You highlight the words you wish to link, optionally you can use bold or italic or even underlined as per your preference, then click on the link symbol ( ∞ ) and a rectangular box will pop up, where you insert the URL with your link to add. Save by clicking on the arrow and the job is done. Easy right!
Let´s Add An Image
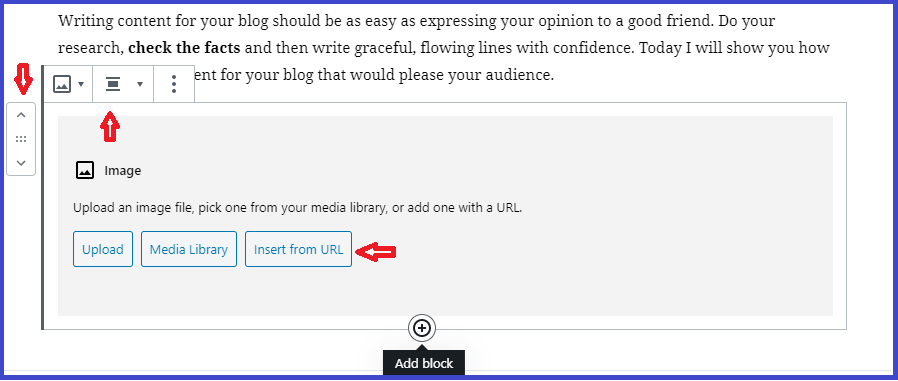
Once again we click on the (+) sign located in the toolbar at the top left of your blog or the one placed in the middle of the bottom line of the previous block. Select image and a box will appear giving the option to either upload an image or insert an image from your media library. Once you upload the image you have the option to align it as you wish (centre, left, right).
Some Other Blocks That You Can Create
- embed a video
- insert a list
- a table for your content
- columns
- audio
Adding a CTA Button
A CTA (call to action) is commonly used to insert a link (also affiliate link) and redirect people to your recommended product. It is very easy to create as a separate block and you can make it as colourful and attractive as you like using the colour palette shown in Fig 5.
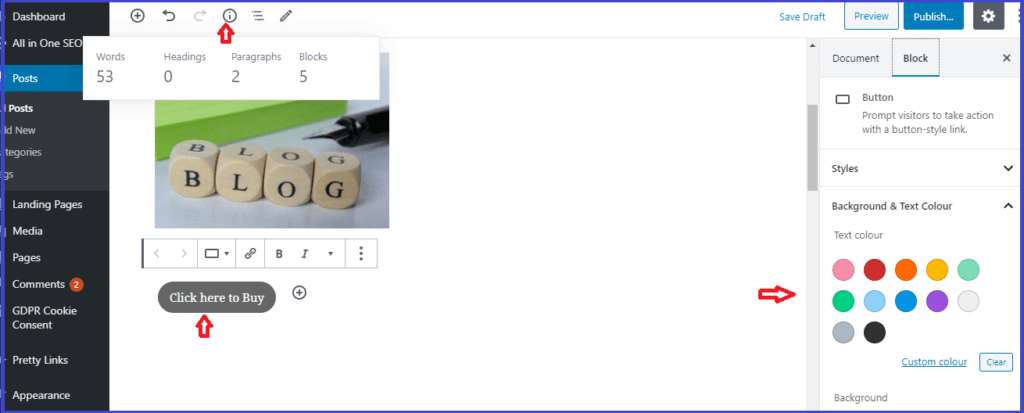
One interesting icon is the (i) as it lists the number of words, headings, paragraphs and Blocks that you have created so far, and you can keep track of your word count and refer to it whilst building your article. See Fig. 5.
Move Blocks around
One cool thing about Blocks is that apart from adding and deleting Blocks you can also sort them, move them up or down to where you want them. This is as simple as clicking the arrow key that shows on the left-hand side. See Fig. 4
Besides, you can drag and drop any block by clicking on the six dots that appear in between the arrows and drag the block wherever you want on the post.
The purpose of this is perhaps once you finished writing your article and have added all your images, you may want to exchange images and move the bottom one to the top and the top one to the centre. Or maybe some paragraphs seem to make more sense if you switch them. Another convenient feature is when you create a button to make something stand out or a Buy Now button (see Fig.5) that you may wish to repeat in your Best of Product post. You create it once and then duplicate and move below the various products.
Manage Block Settings
On the right-hand panel of your blog post you can find the block settings. Under document section is where you can add Tags and featured image for your article, save your post under a particular category etc. (see Fig.7) These vary depending on the theme you use.
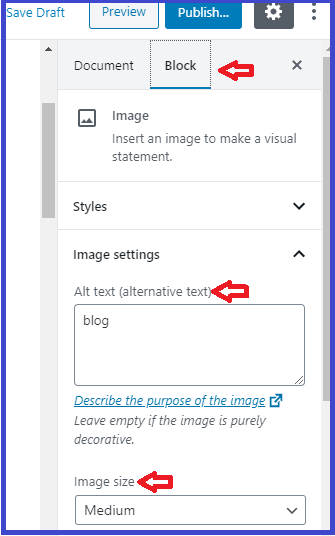
Fig. 6 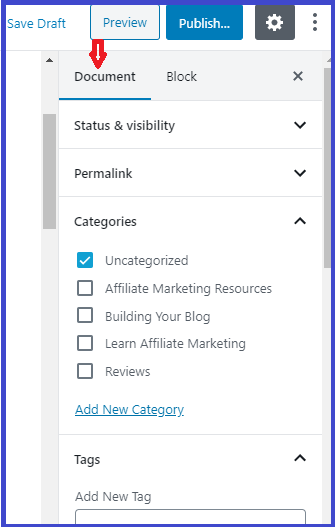
Fig. 7 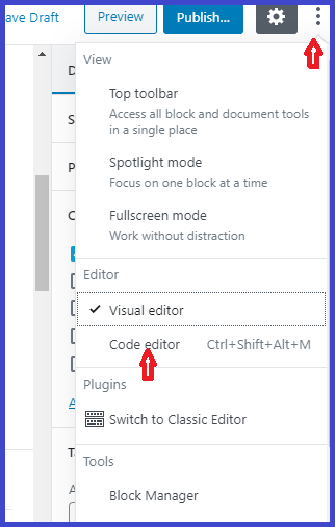
Fig. 8
Under the block section you have the settings related to the block you are working on at the moment. For example if you are on an image block you can adjust the image size or you can enter the ´Alt text´ for the image which helps in your SEO ranking (see Fig.6).
The three dots display other features and from here you can change from visual editor to code editor (see Fig.8).
Conclusion
By now you should have learnt how to insert blocks, how to configure blocks as well as how to move and manage blocks in Gutenberg.
I hope you find the information helpful and you will enjoy writing using Gutenberg Editor. Do let me know if you have any questions in the comment section below.
Here’s a quick tutorial on Gutenberg Editor by Envato, to help you visualise what I explained above.
Good Luck!
ALREADY ITCHING TO START? Then click here to begin your online business journey for FREE.
Disclosure: This post contains affiliate links. For more information please see my disclosure here
Marisa
affiliateresourcesandtools.com
